
Tags
crystal, DIY, sunglasses, Swarovski, SWAROVSKI Elements, trends

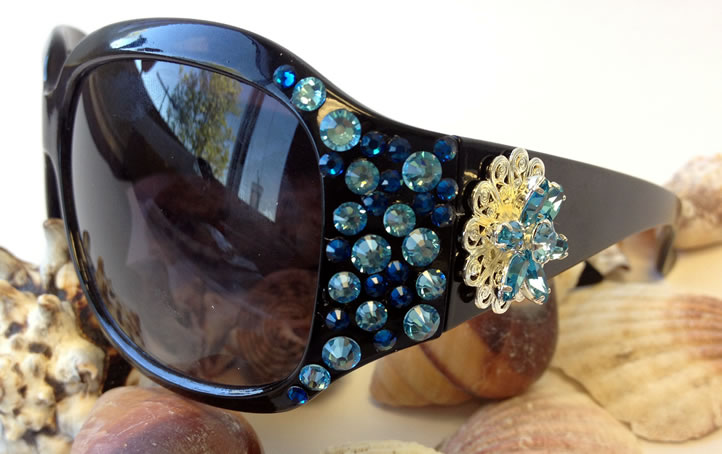

Would you ever guess that these fabulous shades had rather humble beginnings at my local Dollar Tree? Of course not! That’s right, they only cost $1. So of course I snatched up several pair to play with. I have some other styles in mind that I’d like to create (like this pair from I Spy DIY) but this is what I decided to make first.
Supplies:
Swarovski Elements Crystal Filigree
Flat Back Crystals
E6000
Rhinestone Chain
Tooth picks
Steps:
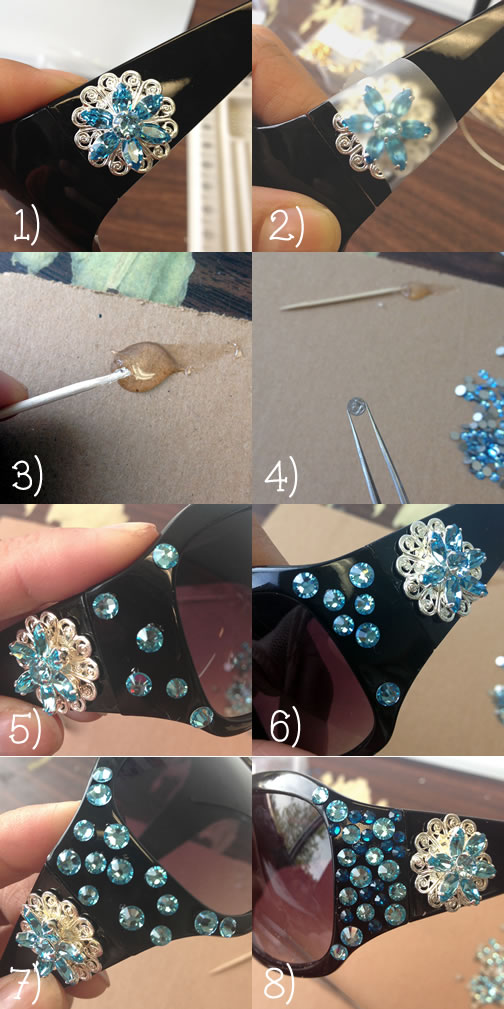
1) Glue the crystal filigree into place.
2) I had to use a piece of tape to keep my crystal filigree into place while the glue dried.
3) Put a small puddle of glue onto a scrap of cardboard. Dip your tooth pick into the glue to apply a small amount to the rhinestone. This glue dries really fast, so just use a small amount at a time.
4) Using a fine nose tweezer, set your stone into place.
5) Place the largest sized crystals first. I chose three different sizes to work with.
6) Then stick your next largest into place.
7) The sides of my sunglasses are not symmetrical. You may want to sketch your design out ahead of time for better results. But hey, I’m more of a fly-by-the-seat-of-my-pants kind of girl.
8) Fill in the rest of the space with your smallest size crystal.
Variations:
Try gluing some rhinestone chain across the bridge of the glasses for a retro, bling-ed out look!
Hope you have as much fun making yours as I did making mine!

Want a better way to read our blog? Follow us on Bloglovin’!

Pingback: Pinteresting Things to Try This Weekend | Shipwreck Beads
I love a pair of bling-ed out sunglasses, especially when they started out so cheap! These are great!